This article assumes you are using linux, and mysql has already been installed and configured.
Starting the interactive environment
Start a linux terminal (CTRL+ALT+T) and type the following:
mysql --user=<username> --password=<password>
Where <username> is the name of the user that has access to mysql, and <password> is his/her/their password.
Creating a database
Once you have started the interactive environment as explained above, you can start creating databases by typing the following command:
create database mydatabase;
Please replace mydatabase with the name of the database you want to create.
Defining permissions
To grant a user all rights on all databases, you can use the following command:
grant all privileges on *.* to 'username'@'localhost' identified by 'mypassword' with grant option;
Of course this is not the safest setup, you should always limit the privileges as much as possible. So to grant a user only select on all databases, you could use:
grant select on *.* to 'username'@'localhost'
Suppose you want to give select access on one specific table in one database, to a user coming from any host:
grant select on `mydatabase`.`mytable` to 'username'@'%';
Notice the backticks around the databasename, and the tablename. And the % sign to indicate any host.
Showing permissions for a user
show grants for username@localhost;
Using a database
Before you can access a database, you have to tell MySQL which database you want to use:
use mydatabase;
Replace mydatabase with the name of the database you want to access.
Creating a table
Suppose you want to create a table ‘products’ in database ‘mydatabase’ with the following fields:
'id'          : a unique recordkey filled automatically
'name'        : the name of the product
'description' : a longer text describing the item
'stock'       : a number, no decimals
'price'       : number, two decimals
'dateupdate'  : date field
The primary index will be on the unique id, a secondary index will be on name.
To create this table, use the following command:
use mydatabase;
create table products (
id INT NOT NULL AUTO_INCREMENT,
name CHAR(255),
description TEXT,
stock BIGINT,
price DECIMAL(9,2),
dateupdate DATE,
PRIMARY KEY (id), KEY(name)
);
A short explanation:
the field ‘id’ is created as an INTeger, can NOT be NULL, and is AUTOmatically INCREMENTed, ‘name’ can contain 255 CHARacters, ‘description’ can contain a large TEXT, ‘stock’ is a BIG INTeger, so it can’t have a decimal point, ‘price’ is 9 characters long, 2 after the decimal point.
List all tables in a database
To list all tables in database mydatabase use the following commands:
use mydatabase;
show tables;
Show the structure of a MySQL table
To show the structure of table ‘products’ use the following command:
use mydatabase;
describe products;
This will get an overview similar to the one below:
+------------+--------------+------+-----+---------+----------------+
| Field      | Type         | Null | Key | Default | Extra          |
+------------+--------------+------+-----+---------+----------------+
| id         | int(11)      |      | PRI | NULL    | auto_increment |
| name       | varchar(255) | YES  | MUL | NULL    |                |
| description| text         | YES  |     | NULL    |                |
| stock      | bigint(20)   | YES  |     | NULL    |                |
| price      | decimal(9,2) | YES  |     | NULL    |                |
| dateupdate | date         | YES  |     | NULL    |                |
+------------+--------------+------+-----+---------+----------------+
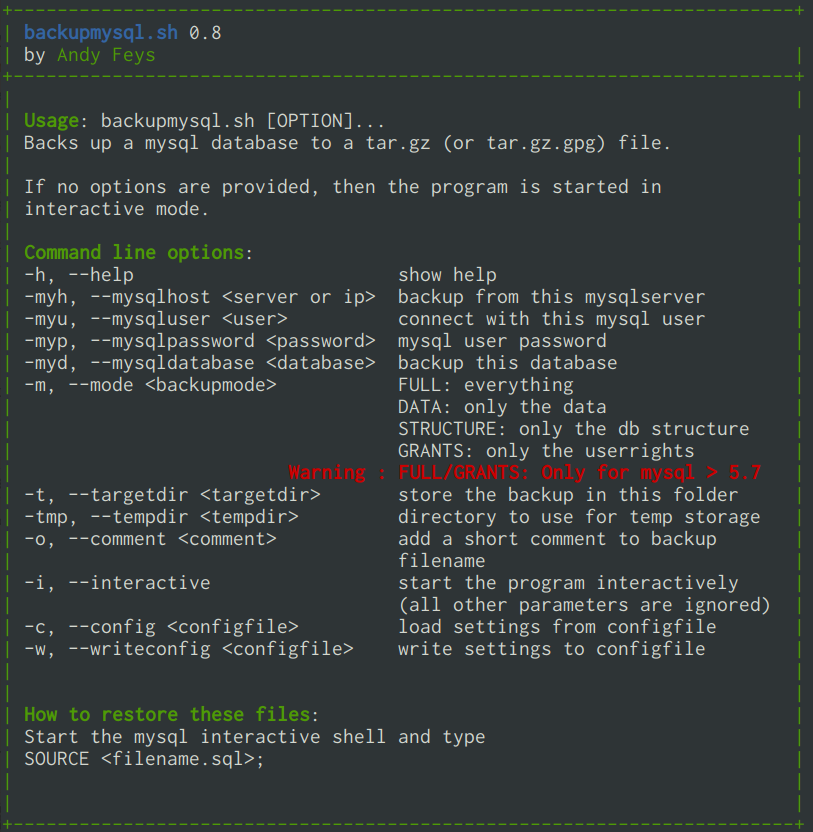
Backup and restore of MySQL databases
There will be a separate post for this, including a handy little script to automate this.
A simple way to backup the database is type the following command on the bash prompt (Not inside the mysql interactive environment)
mysqldump mydatabase > backup_mydatabase.sql
Replace ‘mydatabase’ by the name of the database you want to backup, and ‘mydatabase.sql’ by the name of the backupfile.
To restore this you open the mysql interactive environment, create an empty database as explained below, select the database and then process the backup file. You can do this as follows:
create database mydatabase;
use mydatabase;
source backup_mydatabase.sql
Replace ‘mydatabase’ with the name of your database and ‘mydatabase.sql’ with the name of you backup file. It is best to use the full path here (e.g. /home/dbadmin/backups/backup_products_database.sql)